TABLE OF CONTENTS
- Video Guide Registration Process
- 1. Activate account on ERV Portal (FP Digital)
- 2. The Welcome Page
- 3. Request Mailbox (FP Digital)
- 4. Log in to the Judiciary (Judiciary)
- 5. Certificate (Federal Chamber of Notaries)
- 6. Upload Certificate (FP Digital)
- 7. Adjust User Rights (FP Digital)
- 8. Add Users
- 9. Further Information
Overview of general setup process - Please click

Video Guide Registration Process
1. Activate account on ERV Portal (FP Digital)
To set up an eBO account, we will send a registration email following your order, with which you can create a user account in the FP Digital ERV Portal. This step takes place entirely within the responsibility of the provider FP Digital. It is mandatory that a valid mobile number is provided during registration for sending the activation key via SMS for portal activation.
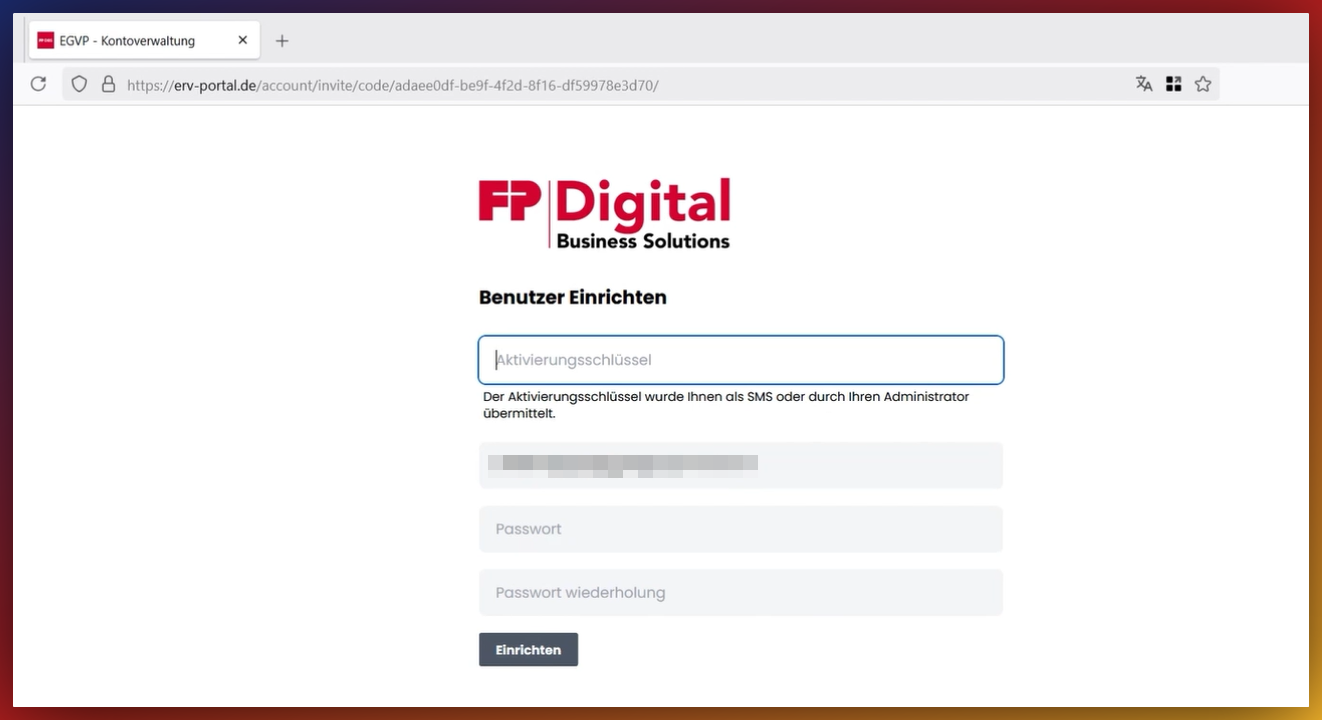
After clicking the link in the welcome email, an individual activation key must be entered, which is also provided by FP Digital via SMS after setup. This ensures the account assignment.
Procedure after receiving the welcome email - Please click
You will first receive the following email:
To complete the account registration and gain access to all functions, you must create an account in our system.
Important: An activation key has been transmitted to you via a separate channel (SMS or personally). This is required for the next step.
(Here, your personal link will be in your mail)
As soon as you have successfully completed this step, we will grant you full access to the EGVP account management.
When you click the link, you will be taken to a page with the following request:
c. 2FA (FP Digital)
Before you can use the ERV Portal, you must set up Two-Factor Authentication (2FA).
This additional security step protects your account from unauthorized access and is mandatory for using the application.
This is also done within the FP Digital Portal. You will need access to your email address, a mobile phone, or an authenticator app for this.
Procedure for Two-Factor Authentication - Please click
Two-Factor Authentication (2FA) significantly increases the security of your account. Follow the next steps to complete the setup.
Click on the button: 'Complete Two-Factor Authentication'

Click on the button 'Next'

Please select your preferred method for confirming your identity:
- Code Generator (e.g., Microsoft Authenticator, Google Authenticator)
- SMS (One-time code via text message)
- Email (Code is sent to your email address)
You can add further methods or change existing methods later in the settings.

2FA in Token Generator/Authenticator App
For the token generator, select your preferred authenticator app and download the app to your smartphone, then follow the provider's instructions to set up the app.
Select the first option from the selection menu:

Then you must scan this code with your authenticator app or enter the secret key in your app:

If you have successfully completed the setup, the 2FA with the Authenticator App will be displayed in the portal in the settings under Account Security >> Activated 2-Factor Methods and can be changed if necessary.

2FA with SMS
Select SMS and click on 'Next'.

Enter the mobile number to which the confirmation code should be sent via SMS. The number will be verified in the next step.

The number is verified, and if entered correctly, you will then be redirected to the settings, where you can see your mobile number under Account Security >> Activated 2-Factor Methods and change it if necessary:

2FA with Email Address
Select Email Address in the selection overview. Then click on 'Next':
Open the email and copy the code:

Paste the code here and click on 'Next':

The email address is now set up and can be used for 2FA. You will be redirected to the settings, where you can see your email address under Account Security >> Activated 2-Factor Methods .

2. The Welcome Page
After the initial login and setup of Two-Factor Authentication, you will arrive at the welcome page.
From here, you have full access to all other functions. As the next step, navigate to request your mailbox.
Overview of the landing page - Please click
In the text, you will find the link to this help page so that you can find your way back here at any time. On the right side, in the sidebar, you will see the 'Start' area at the top, where you can navigate to your 'Messages', and the 'Settings' item, where you can make changes later. The 'Logout' button is also located there. Under the item 'My Safe-IDs' you can manage your Safe-IDs (certificates). (For request/setup, see point 3 and following). Below that, you will find the user administration, where you can 'Invite Users' and assign 'User Rights'. (For more detailed instructions, see point 8 and following). Finally, you will find the options 'User 2FA' for setting up, changing, and deleting your Two-Factor Authentication (covered here in point 1) and the option to change the password.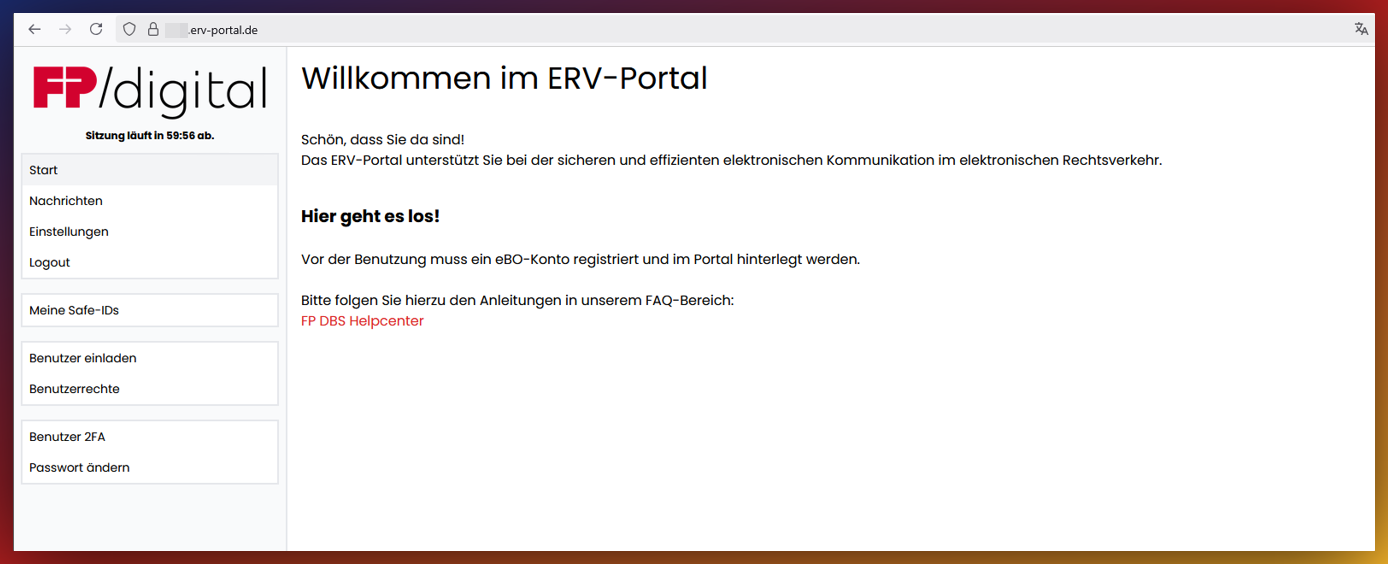
3. Request Mailbox (FP Digital)
The eBO mailbox is requested via the FP Digital Portal. Only after its activation is the inbox active for secure transmissions.
On this page, the mailbox is activated and linked to the user account.
Instructions for eBO Activation - Please click
First, check your own user permissions to ensure that you can edit your SAFE-IDs:
To be able to manage SAFE-IDs , a checkmark must be set in the column 'SAFE-ID Administration' for your own user in the User Rights section. If you want to add your own users later, the checkmark under Rights and User Administration must also be selected.
More on user permissions from point 7.

Then click on the item 'My Safe IDS' in the left sidebar; there you can see an overview of all your eBO certificates and accounts.
If you have not set up any accounts yet, the page is empty. Click on the button 'Add New SAFE-ID'.

You will then be asked whether you want to create a new eBO mailbox or upload an existing SAFE-ID. Then click on the item 'Create New eBO Mailbox'.

'Your SAFE-ID has been successfully created. Please perform the activation now. To do this, click on the button 'To Activation Page' to activate the SAFE-ID.

By clicking the button 'To Activation Page', you leave the ERV Portal of FP-Digital.
You will be redirected to the access page of the Judiciary and prompted to enter your activation data for the eBO account activation.
We have prepared an eBO account for you, which must be activated by you. Activate your eBO account with the SAFE-ID (this is automatically inserted) and choose a password yourself and enter it.
You can also find the SAFE-ID in your portal.
By clicking the button 'Activate', your self-assigned access data is saved and transmitted to the Judiciary system.

An info banner appears with the message for successful activation.
Click on the link in the banner to complete the registration with the Judiciary and the Federal Chamber of Notaries.
You will then be redirected to a page of the Judiciary, thus leaving our eBO environment at this point.

Continue the registration of your eBO mailbox on the following Judiciary page (See Point 4. Log in to the Judiciary):
⇒ Click here for the Judiciary page
4. Log in to the Judiciary (Judiciary)
You must log in to the Judiciary page with the Judiciary access data just assigned. This takes place on a portal operated by the Judiciary and is necessary to make your mailbox visible in the justice system.
Login Procedure - Please click
You must log in to the following Judiciary page with the assigned Judiciary access data:
⇒ Click here for the Judiciary page
This login mask is operated by the Judiciary and is necessary to register your mailbox and make it visible in the justice system.

Click on 'Login with Username / Password'.

Log in with your personal access data for the Judiciary .

Identification is required for the full activation of the mailbox. This can be done either via the electronic identity card (nPA) or via a notary appointment.
Identification via the nPA procedure takes place directly in the Judiciary portal, supported by the AusweisApp.
Instructions for nPA - Please click
Unfortunately, the AusweisApp is not within our access, so we cannot offer support for the app. You can find official instructions for nPA from the federal government here:
Request PIN reset letter here:
If you have unsolvable problems with the AusweisApp, there is also the option of notarial identification as an alternative.
Complete data
Identification at the notary takes place via the portal of the Federal Chamber of Notaries. There, additionally
required personal information is supplemented and verified.
Identification Procedure - Please click
In this step, you prove your identity.
Select an identification option under the corresponding menu items. The corresponding instructions on the page will assist you with identification.

5. Certificate (Federal Chamber of Notaries)
After successful identification, a digital certificate is created. To create and download your certificate, please click here:
⇒ Click here to download the certificate
Based on the identification, the BNOTK generates the necessary certificate for secure communication with the Judiciary.
b. Download Certificate (BNOTK)
After successful identification, a note in blue text will be given on the Judiciary page that you can download your certificate. The certificate is required for the operation of the eBO mailbox.
The certificate is made available for secure download on the BNOTK portal. This means you must download and save it to your system.
Create and download certificate - Please click
This step-by-step guide shows how you can create and download a certificate.
To download the certificate, please click
⇒ On this link You will be redirected to the Federal Chamber of Notaries page for certificate creation.

After clicking on Login to Certificate Creation, you will be prompted to re-enter your Judiciary login credentials.

You will be redirected back to the Federal Chamber of Notaries and can now assign your own PIN to your certificate.

Then click on the grey button Create Certificate. The field looks inactive, but it is active.

The certificate named eBO-Certificate.p12 will now be downloaded and will then be in your download folder.

6. Upload Certificate (FP Digital)
For the FP Digital ERV Portal, the certificate must then be uploaded. This step is crucial to connect the mailbox to the Judiciary network.
To upload the certificate to the ERV Portal, after completing the registration, you have the option to download the key material for the mailbox certificate in your access ⇒ at the Judiciary (See Step 6).
You can upload the key material (certificate) yourself in the portal.
Upload Key Material/Certificate - Please click
To upload your just created key material/certificate, please switch to Settings >> My Safe-IDs, navigate to the 'Mailbox' button and click on the 'Browse' button,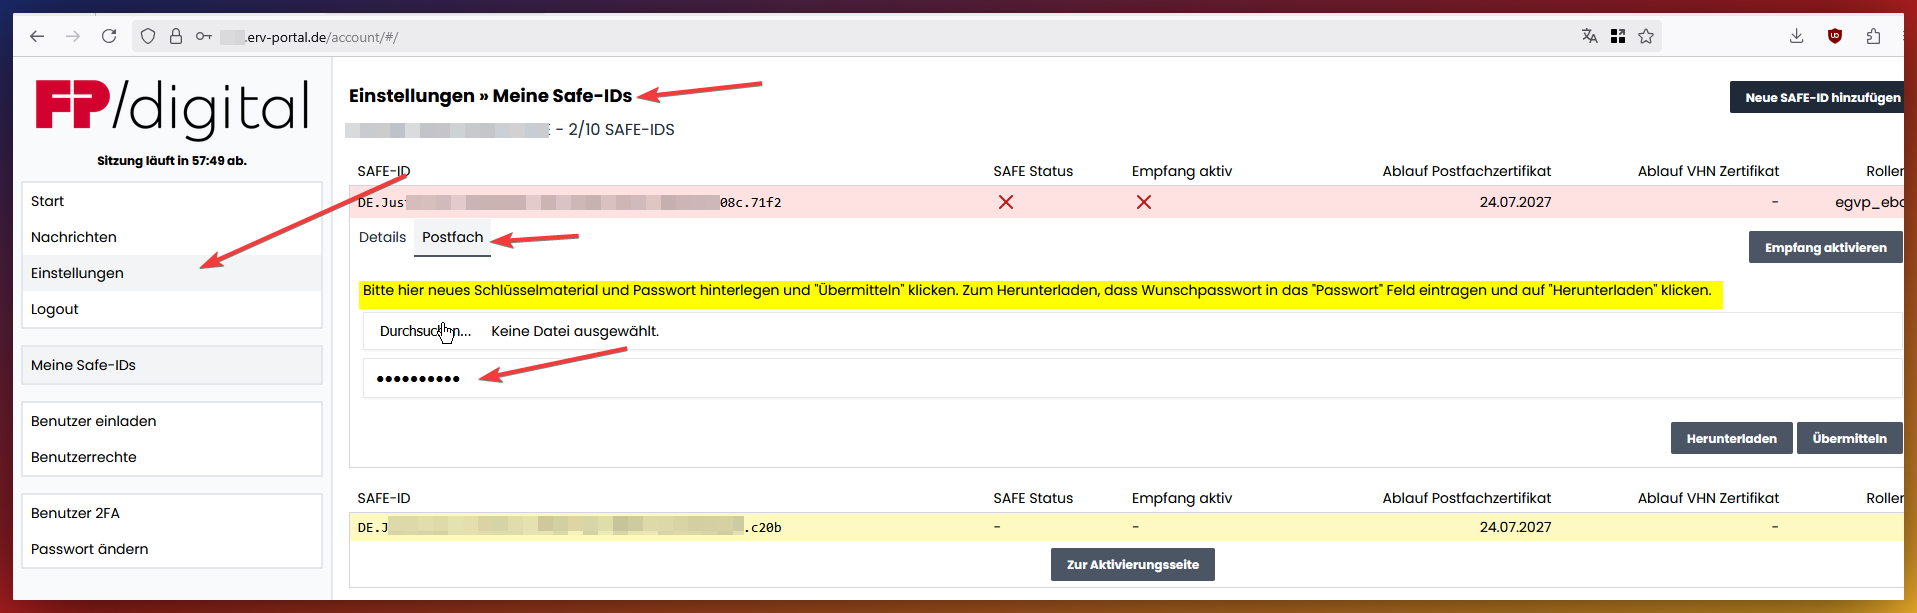
Select the certificate file in .p12 format you created and upload it.

Click on the 'Password' field and enter the password you set for the certificate.

Then upload it by clicking on 'Submit'. The password is checked, and the certificate validated.

Your mailbox is ready for use as soon as you can see two green checkmarks under the columns 'SAFE Status' and 'Reception Active'.

7. Adjust User Rights (FP Digital)
Finally, the user rights in the FP Digital ERV Portal must be checked and adjusted. Otherwise, the mailbox cannot be used.
If you have added additional users, permissions must also be granted to these users. You can grant only basic permissions to send and read messages, or also grant administrator rights to manage mailboxes.
Manage own user rights - Please click
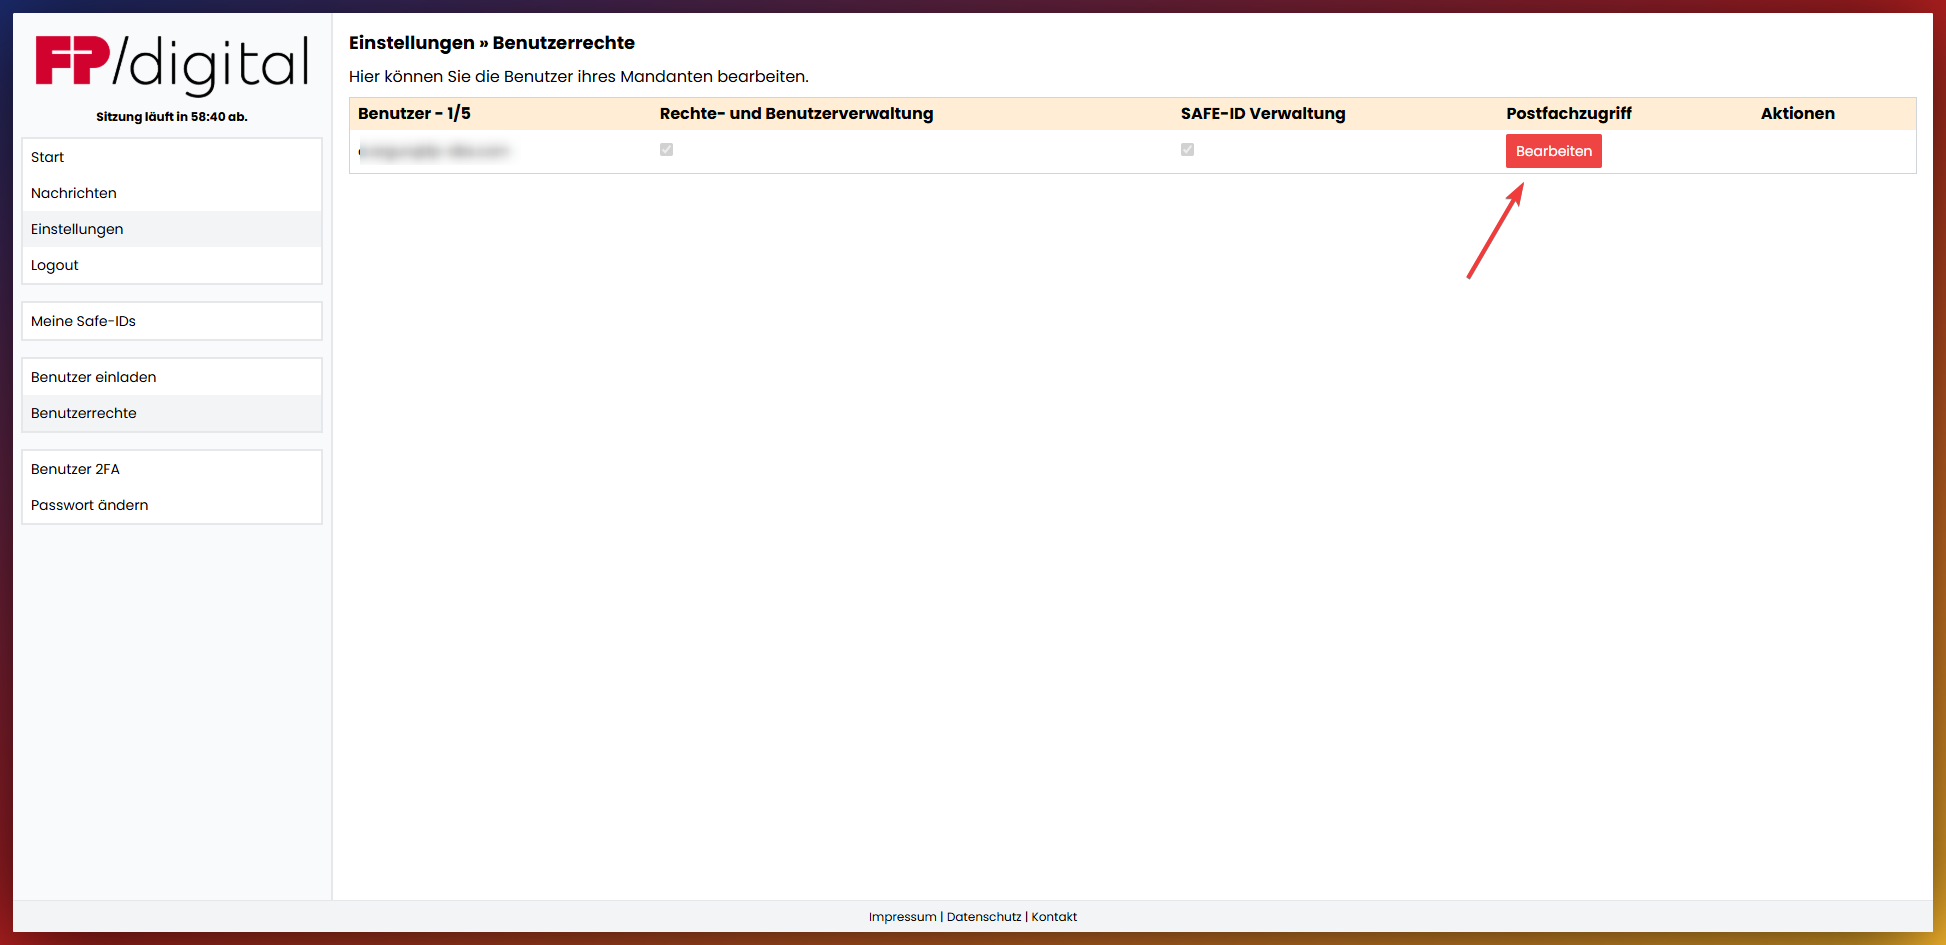
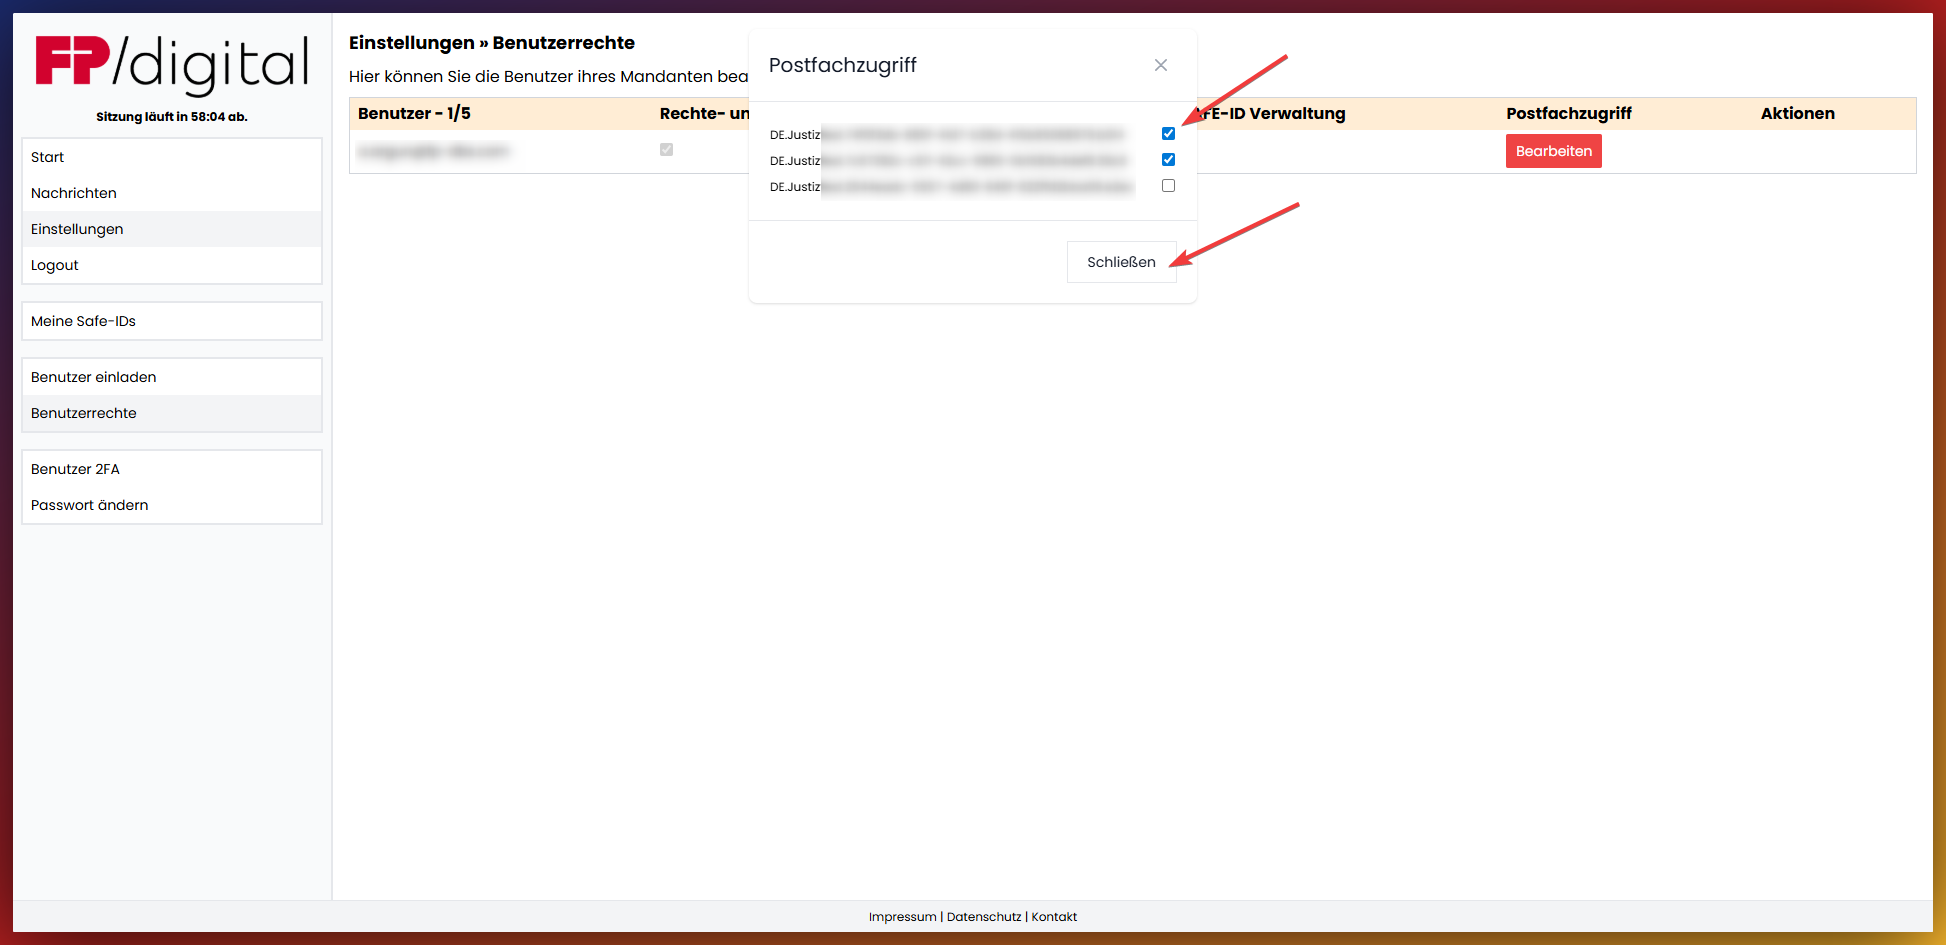
Here you see your own user.
Click on 'Edit' under the column 'Mailbox Access' to assign the necessary user rights.
Mailbox Access - Set up Read and Write Access only for additional users - Please click
Click on 'Edit' under the column 'Mailbox Access' to assign the necessary user rights, or on 'Delete' to remove the user. 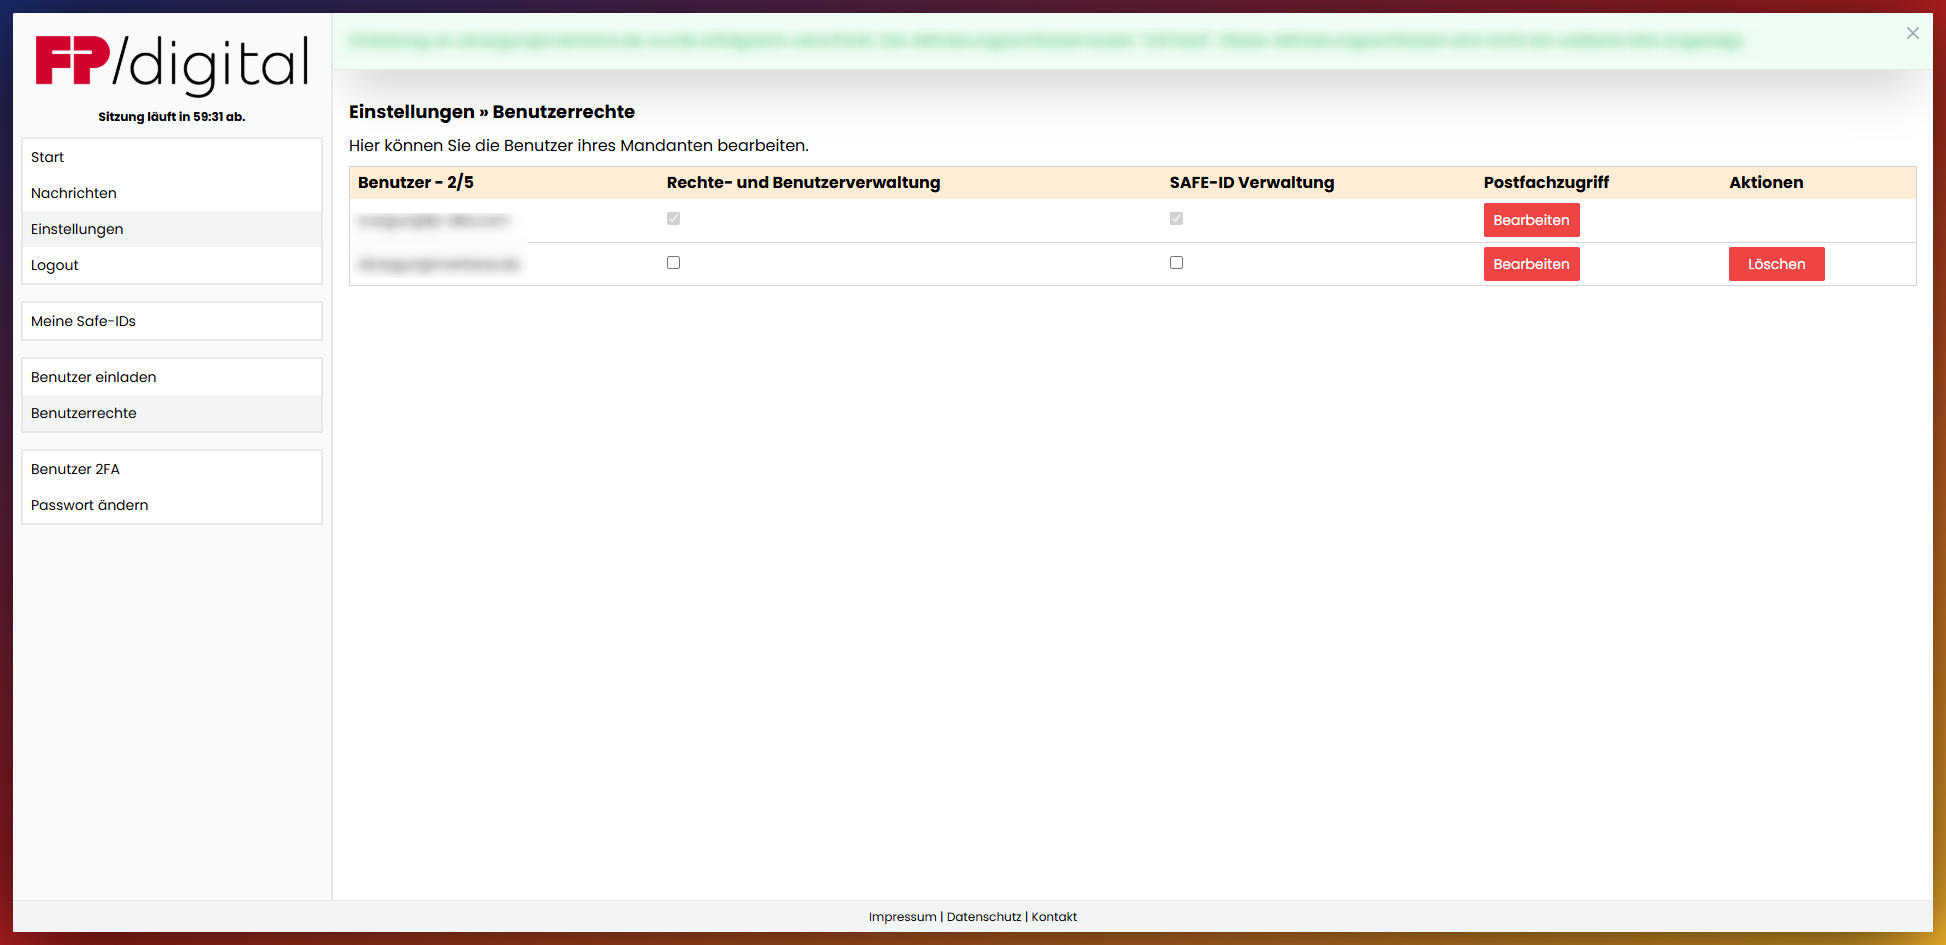
Access to Rights and User Administration - Please click
To grant users the right to user administration, check the box in the column 'Rights and User Administration' for the corresponding user. They can then invite, delete, and grant or revoke permissions themselves.
Access to SAFE-ID Administration - Please click
To grant users the right to SAFE-ID administration, check the box in the column 'SAFE-ID Administration' for the corresponding user. They can then manage the receipt of messages themselves, request and set up additional mailboxes, as well as create and upload new SAFE-IDs (renew expired certificates), however, not view, read or send messages if the corresponding approvals were not additionally granted.
8. Add Users
You can add additional users at any time. Please note that every user must subsequently receive user rights to be able to use the mailbox.
Invite additional users - Please click
Enter the email and phone number of a desired user to invite a user.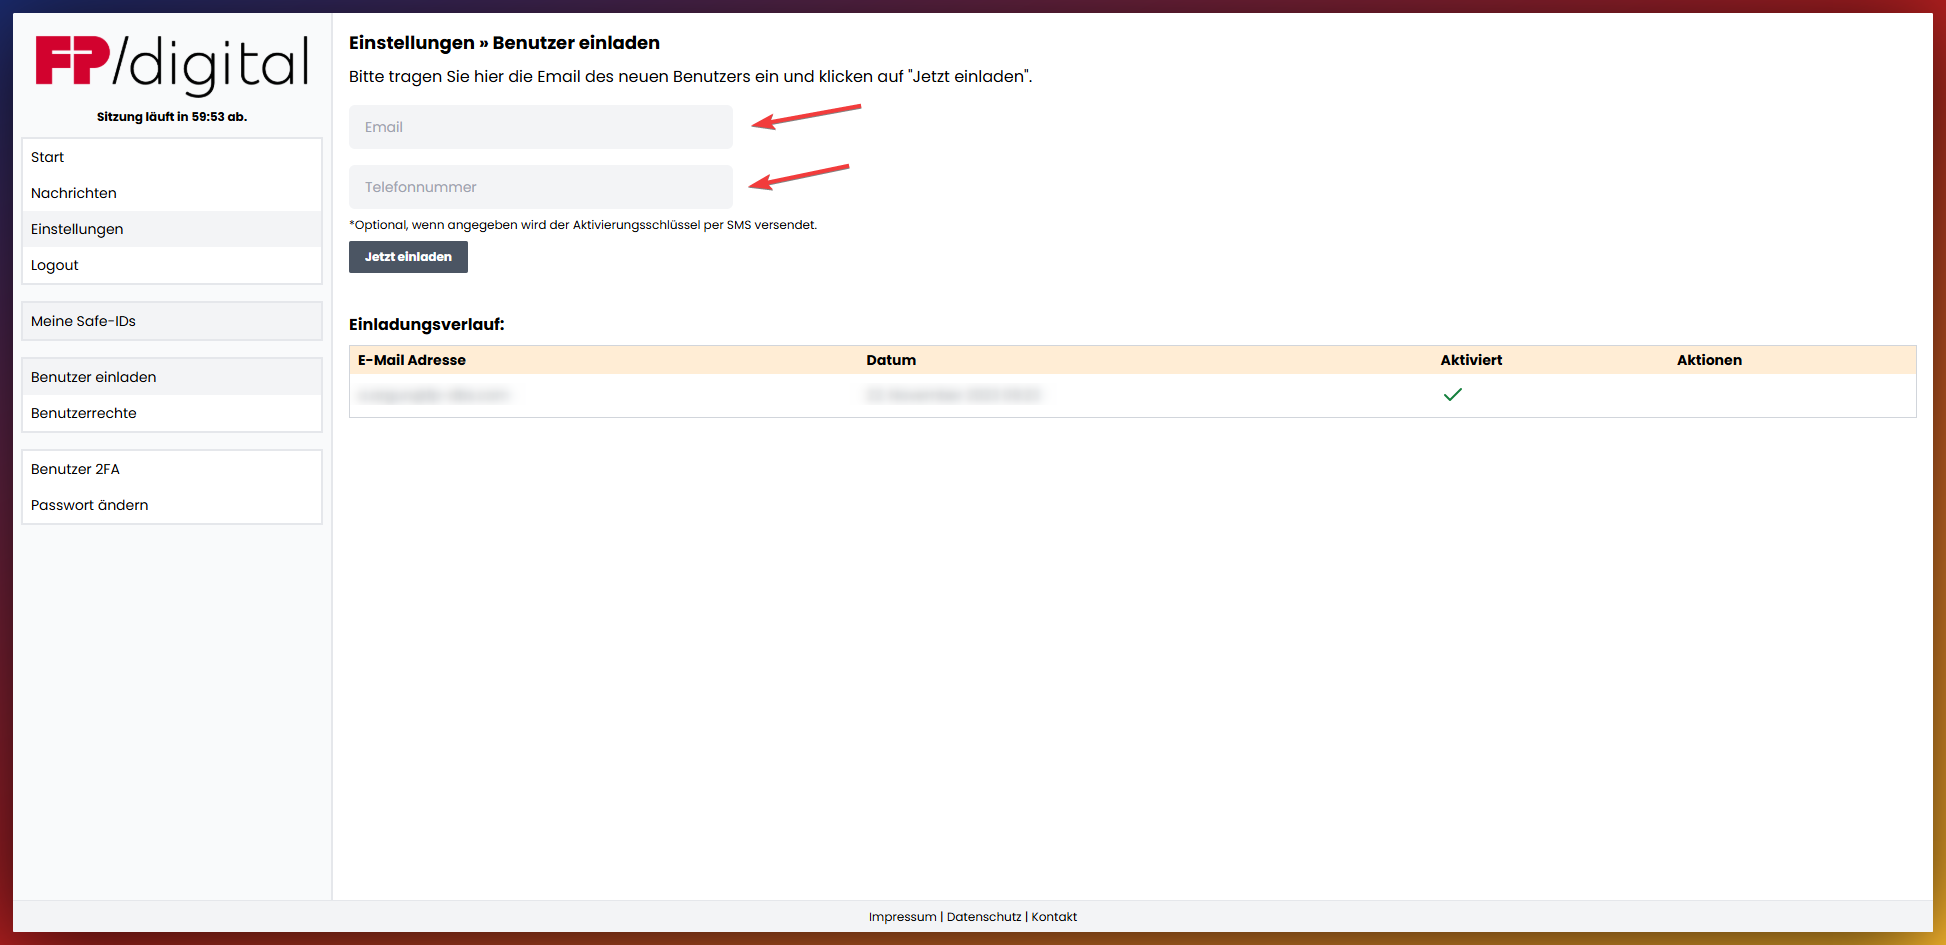
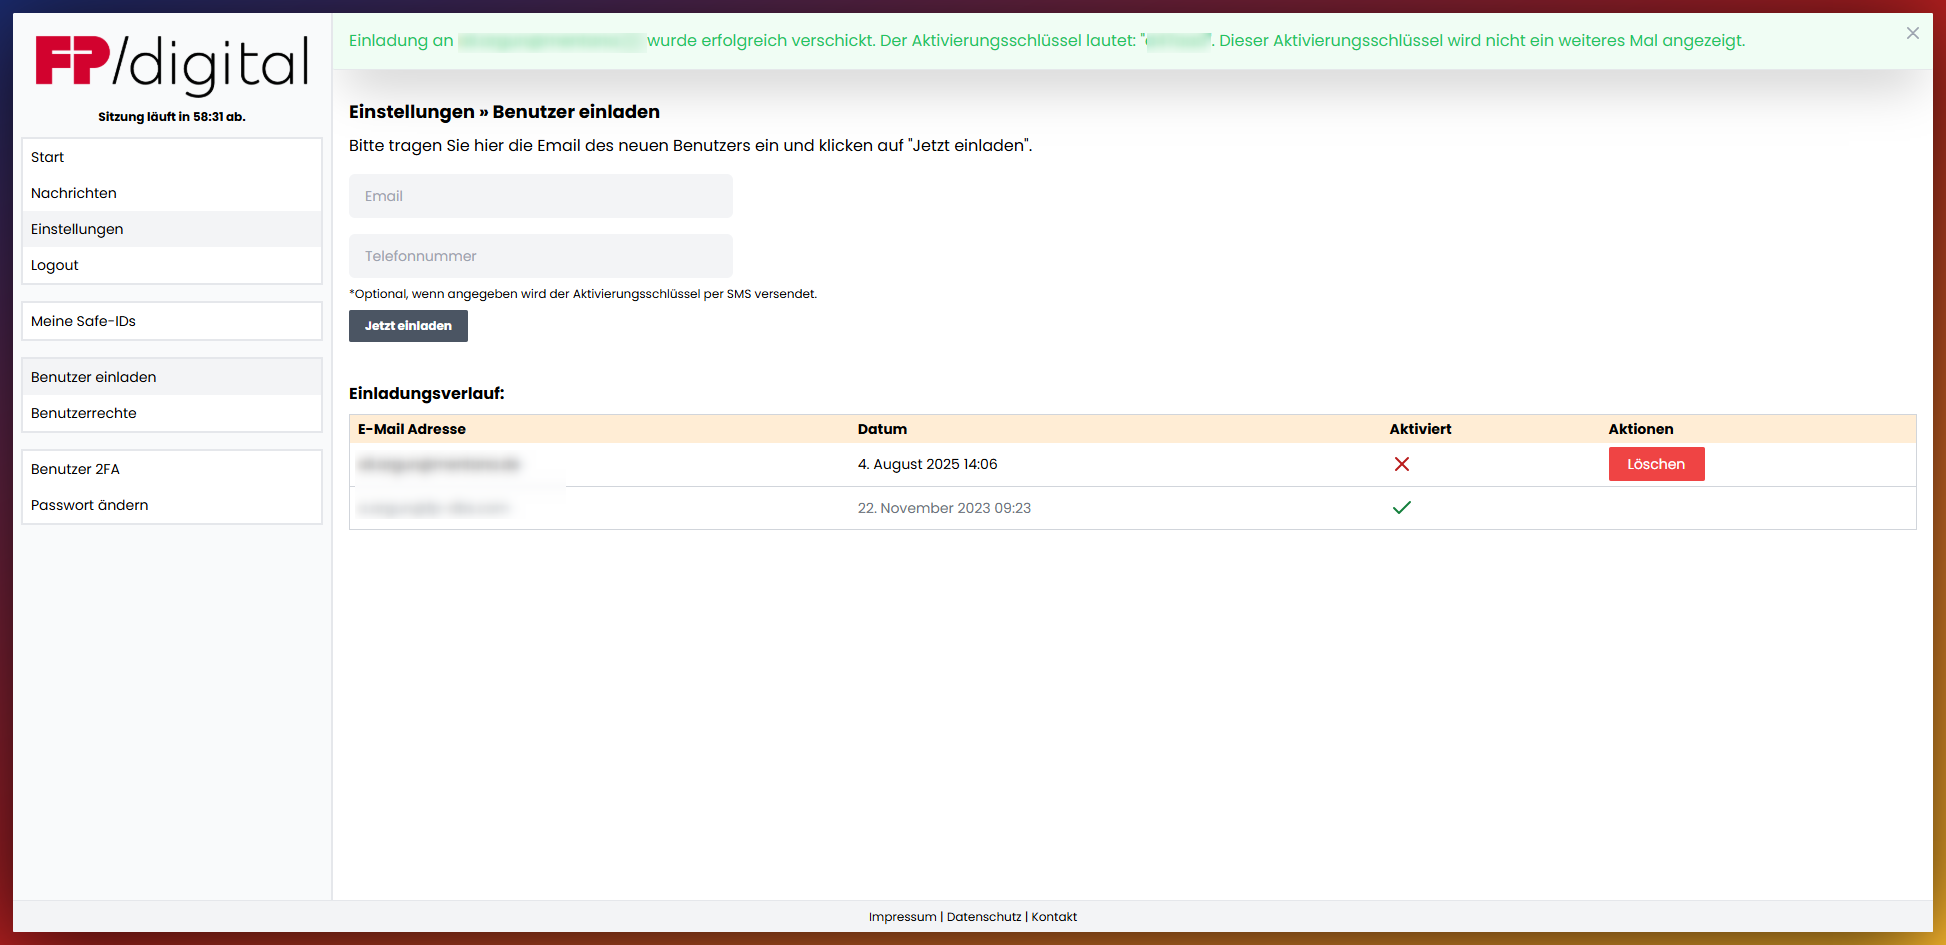
The user can be seen here after being added. The activation key is automatically sent via SMS. If no mobile number was entered and only the invitation was sent via email, a green banner appears showing the activation key.
9. Further Information
Further information on registering your eBO mailbox and the various identification options at the Federal Chamber of Notaries can be found in the ⇒ official guide of the Federal Chamber of Notaries
The key points of the document include:
- Completion of registration: Users must log in to the eBO registration application with their username and password to start the process.
- Identification procedure: Various methods for identification are presented:
- Electronic identification: For citizens using the online ID function of the identity card and the "AusweisApp2". For organizations using a qualified electronic seal.
- Manual identification: Alternatively, identification can be carried out by a notary.
- Authentication certificate: After successful identification, an authentication certificate must be downloaded and integrated into the user's eBO software.
- Special professional groups: There are special instructions for professional groups such as bailiffs, interpreters, patent attorneys, and certain associations and trade unions.
- Data change and password: The guide also explains how users can change their data and request a new password.
Was this article helpful?
That’s Great!
Thank you for your feedback
Sorry! We couldn't be helpful
Thank you for your feedback
Feedback sent
We appreciate your effort and will try to fix the article